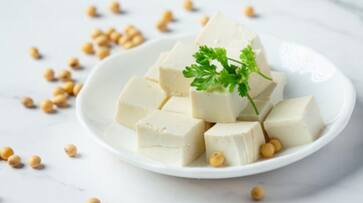
Learn how to turn sour milk into homemade paneer with this easy guide. Save money and reduce waste with fresh, versatile paneer.
Making paneer at home from sour milk is a simple and rewarding process that allows you to transform a potentially wasted product into a delicious and versatile ingredient. Here’s a step-by-step guide on how to make paneer from sour milk:
Step-by-Step Guide to Making Paneer from Sour Milk
Ingredients:
- Sour milk
- Lemon juice or vinegar
- Cheesecloth or muslin cloth
- Strainer
- Heavy object (like a weight or a pot filled with water)
Instructions:
1. Boil the Sour Milk:
- Start by heating the sour milk in a pot over medium heat. To keep it from sticking to the pan's bottom, stir from time to time.
2. Add Lemon Juice or Vinegar:
- Turn down the heat after the milk reaches a boil.
- Gradually add lemon juice or vinegar to the hot milk, stirring continuously.
- As you add the acid (lemon juice or vinegar), you will notice the milk starting to curdle. Keep stirring gently until the milk solids (curds) separate from the whey (liquid).
3. Separate Curds and Whey:
- Line a strainer with a cheesecloth or muslin cloth and place it over a large bowl or sink.
- Transfer the combination of curdled milk onto a strainer and let the whey fall out. The curds will be caught in the cheesecloth.
4. Rinse the Curds (Optional):
- If you prefer a milder flavor, you can rinse the curds under cold water to remove any residual lemon juice or vinegar.
5. Shape and Press the Paneer:
- Gather the ends of the cheesecloth together to form a bundle containing the paneer.
- Press the paneer bundle between your palms to remove excess whey. Then, place it on a flat surface and shape it into a square or rectangular block.
- Wrap the paneer in the cheesecloth and place a heavy object (like a weight or a pot filled with water) on top of it. This helps to press and shape the paneer into a firm block.
6. Set Aside to Firm Up:
- Let the paneer sit under the weight for about 1-2 hours at room temperature. This allows the excess whey to drain off completely and helps the paneer to firm up.
7. Unwrap and Use:
- After pressing, unwrap the paneer and gently remove it from the cheesecloth.
- Your homemade paneer is now ready to be sliced, cubed, or grated as per your recipe requirements.
Last Updated Jul 12, 2024, 4:34 PM IST


![Salman Khan sets stage on fire for Anant Ambani, Radhika Merchant pre-wedding festivities [WATCH] ATG](https://static-gi.asianetnews.com/images/01hr1hh8y86gvb4kbqgnyhc0w0/whatsapp-image-2024-03-03-at-12-24-37-pm_100x60xt.jpg)
![Pregnant Deepika Padukone dances with Ranveer Singh at Anant Ambani, Radhika Merchant pre-wedding bash [WATCH] ATG](https://static-gi.asianetnews.com/images/01hr1ffyd3nzqzgm6ba0k87vr8/whatsapp-image-2024-03-03-at-11-45-35-am_100x60xt.jpg)


